

Georeferencing raster images is a key part of most GIS projects. It involves assigning real-world coordinates to the pixels of an image. The assigned coordinates can be gotten directly using easily identifiable features in the raster image or using the latitude and longitude markings, in the case of scanned maps. However, information from the OpenStreetMap database can be used when dealing with images with no grid coordinates, like aerial images.
This tutorial discusses georeferencing a raster image in any case mentioned above. You’d also learn how to determine an old map's datum and coordinate system, save and edit Ground Coordinate Point (GCP), and use the built-in Nominatim geocoder in QGIS.
Disclaimer: This blog content was written as part of a freelance contract according to their stated requirements. For personal content, view the blog and YouTube sections of this portfolio.
Key Points
To georeference an image on QGIS...
With coordinates: Layer > Georefencer > File > open raster > set transformation parameters > add points > start georeferencing
Without coordinates: Add OpenStreetMap layer > Use the Nominatim geocoder to find the Region of interest > Open the georeferencing tool and adjust its settings to dock on the project layout > Open raster > Set transformation parameters > Find easily identifiable intersections on both maps > Enter map coordinates using map canvas
Georeferencing Raster Images Having Coordinates
Data in use
Here, I’ll use the Soil map of Nigeria data from the European Digital Archive of Soil Maps (EuDASM). Click here to download it if needed for personal practice.
Step 1: On QGIS, access the georeferencing tool from the raster tab or Layer tab in more recent versions (3.26 onwards)
Raster > Gereferencer or
Layer > Georeferencer

On the opened dialogue, import your JPG or PDF file from File > Open Raster < and navigate to the file directory. The image is displayed on the top half of the dialogue.

Step 2: Setting Transformation Parameters
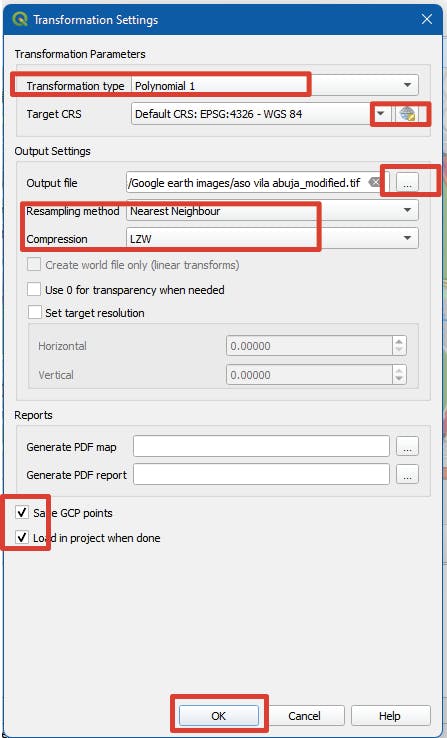
Before adding coordinates to the map, set up the transformation parameters from the transformation settings tab. Set Transformation type -> Polynomial 1 or 2. The latter requires higher precision and accounts for the curved edges of photographed maps. Check out the QGIS Documentation on the different transformation types required for the quality of the input data.
Set Resampling method -> Nearest neighbour. Set the Coordinate Reference System using the Target SRS field.
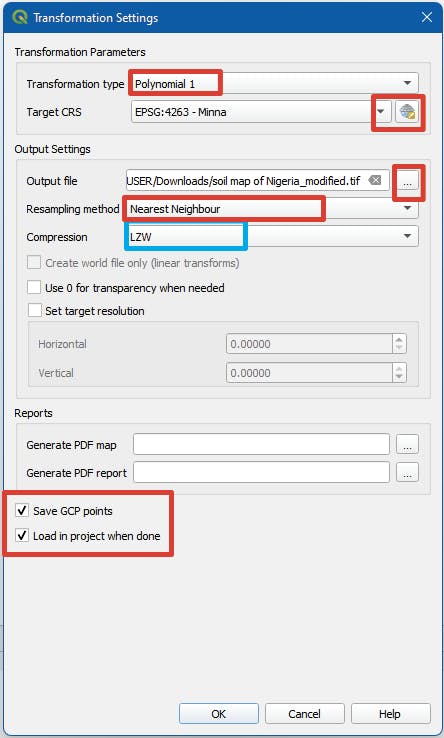
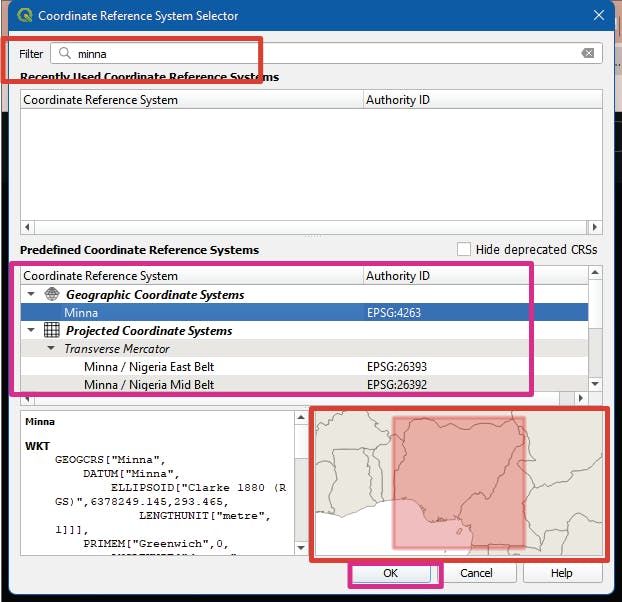
With no defined CRS on the map, we can make an educated guess using the coordinates on the map (in this case, Latitude and Longitude), the year (1964), and the most appropriate datum at the time (Minna Datum). Simply run a quick Google search if you need to be sure.
Browse the Target CRS in the image above >> search for the identified datum >> Find the most suitable from the listed Coordinate Reference Systems using the mini-map displayed below.

Set output raster name and directory. Set Compression -> LZW (this reduces the size of the output GeoTIFF file). Be sure to save the GCP points for future reference and load the data into QGIS when completed. >> OK.
Step 3: Creating GCPs
Click the Add Point Button to add GCPs to the raster. Select an intersection of grid lines and left-click when in position. Precision is a key factor here, so use the provided tools on the toolbar to Zoom in and out, pan, etc.

The X/East coordinates correspond to the lines of longitude while the Y/North correspond to the lines of Latitude. >> OK.
If the coordinates on your map have precision in dd mm ss.ss, separate each value with space as shown.
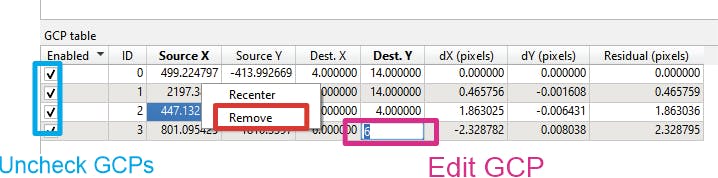
Continue to add at least 6 Ground Control Points(for Polynomial 2) or 4 points for Polynomial 1, as required by the polynomial 2 transformation type. The more fixed points entered, the better accuracy of your result. Watch out for high residuals (error values) as this is typically caused by human input error. To edit an entered GCP, double-click on the Dest-X or Dest-Y cell and enter the correct value. GCPs can also be unchecked to be excluded from the georeferencing process or removed by right-clicking on the point details.
Use the play button on the toolbar to ‘start georeferencing’
Step 4: Confirm Georeferencing
Close or minimize the dialogue at the end of the process.
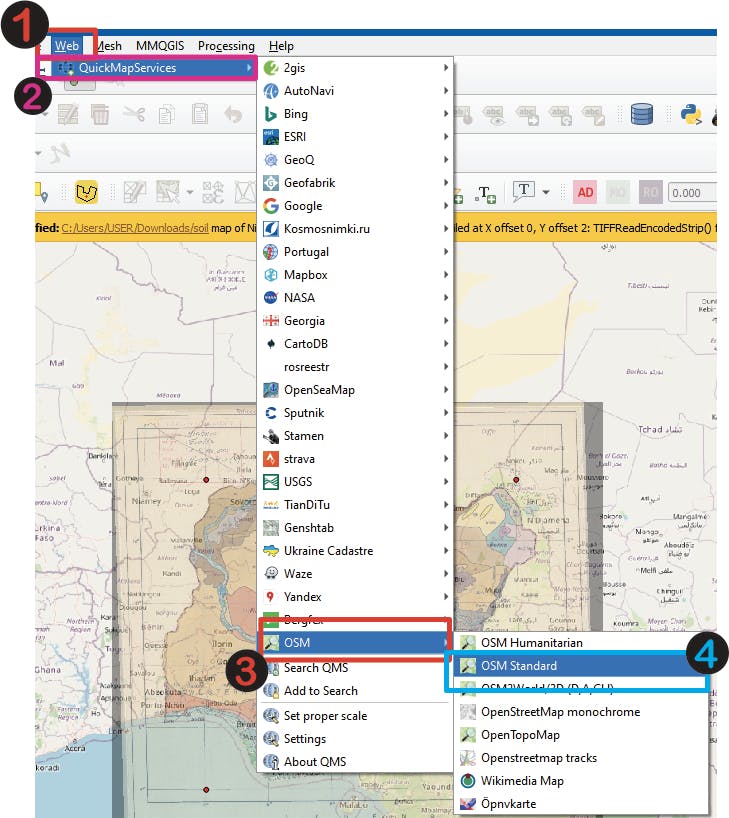
On your QGIS project page, turn on the Open Street Map layer to confirm your image is properly georeferenced.
Web >> Quick map services >> OSM > OSM Standard
On the layers panel, open layer styling >> Transparency > set Global Opacity to 30%

Your georeferenced image should fit perfectly with the OSM map.
Step 5: Access Saved GCPs
To access saved Ground coordinates, open the Georeferencing tool >> File >> Load GCP Points
Georeferencing Raster Images Without Coordinates
Images like aerial images may have no known coordinates. An alternative to getting GCPs from the field is the OpenStreetMap database.
Step 1: Add OpenStreetMap Layer
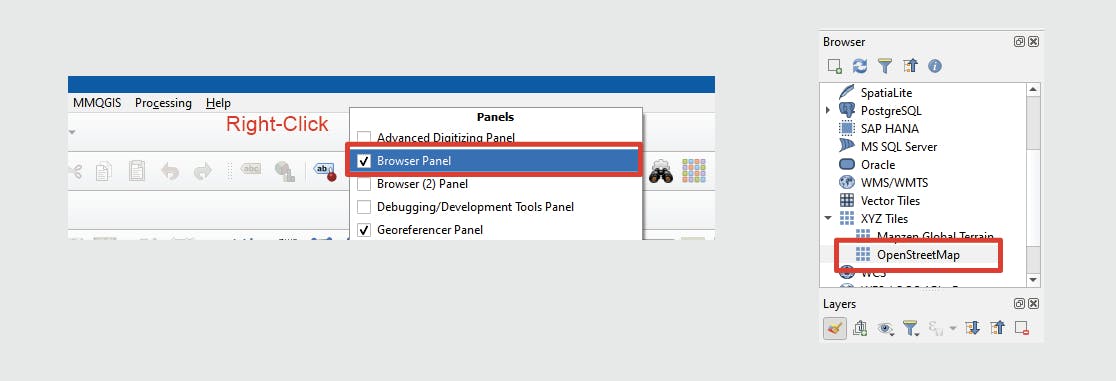
On your QGIS project page, scroll through the Browse panel to XYZ Tiles > OpenStreetMap. Drag the OpenStreetMap layer into the map canvas.
To add the browser panel to your page, right-click on the toolbar and check the box.
Data in Use
Here, I’ll be using Google Earth Imagery of the Aso Rock District, Abuja, Nigeria.
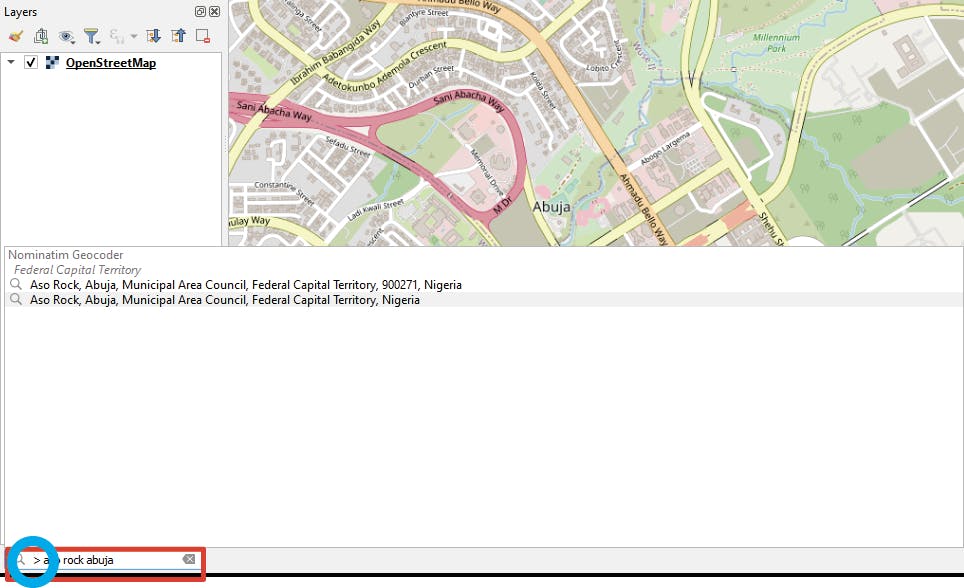
Step 2: Use Nominatim Geocoder
While you can zoom directly to your required location, the built-in geocoder provided by OSM is a cool feature.
On the search tab (bottom left of the QGIS window) enter the right-angle bracket ‘>’ to activate a search on the database. Use the space tab after the search words to start the search.
Step 3: Set up Georeferencing tool
Access the georeferencing tool from the raster tab or Layer tab in more recent versions (3.26 onwards)
Raster > Gereferencer or
Layer > Georeferencer

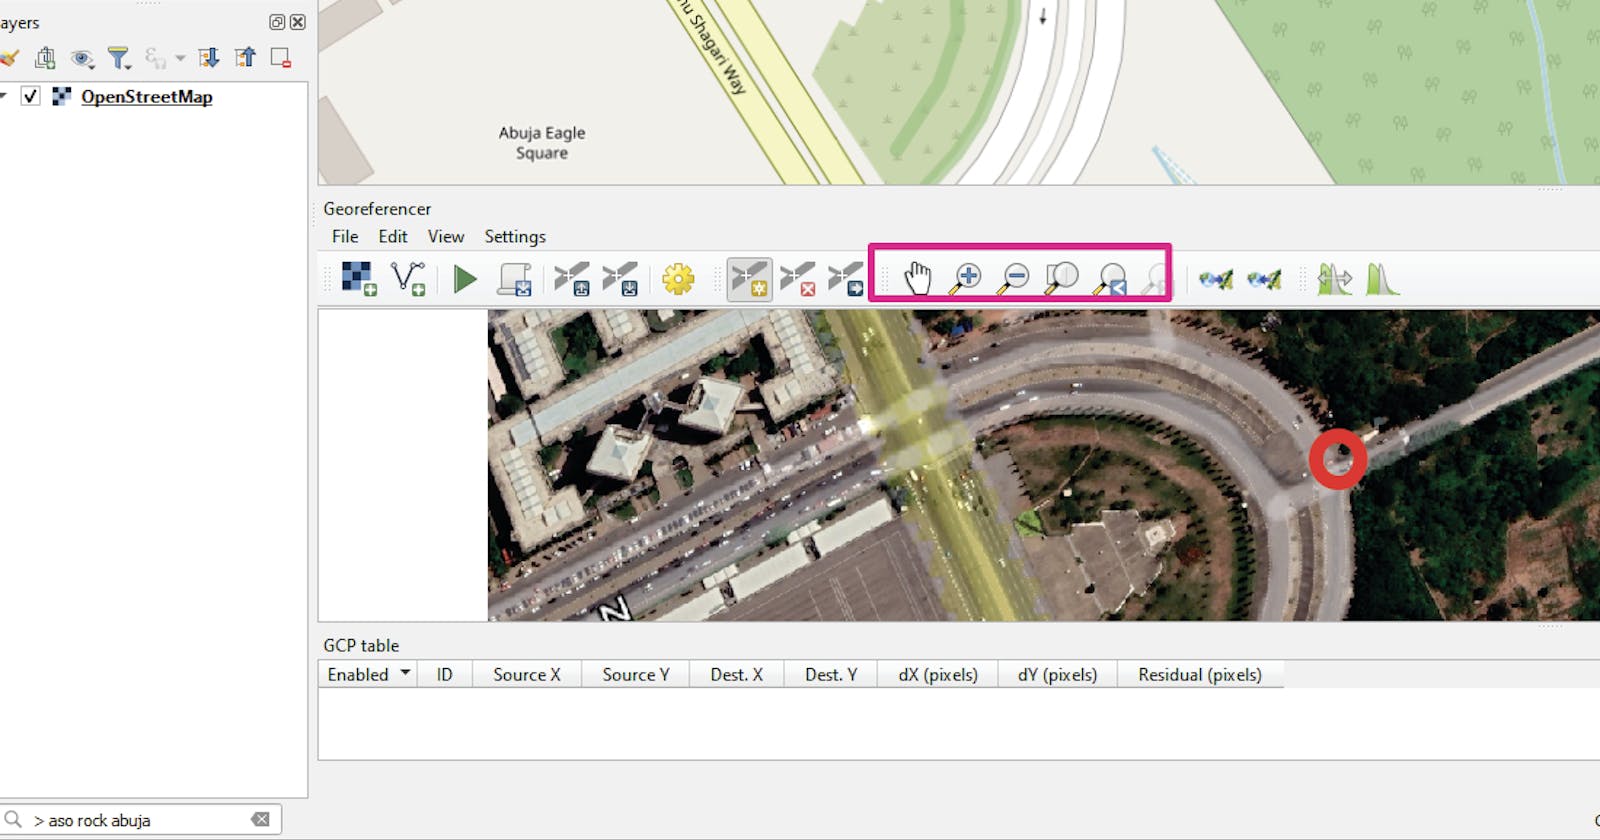
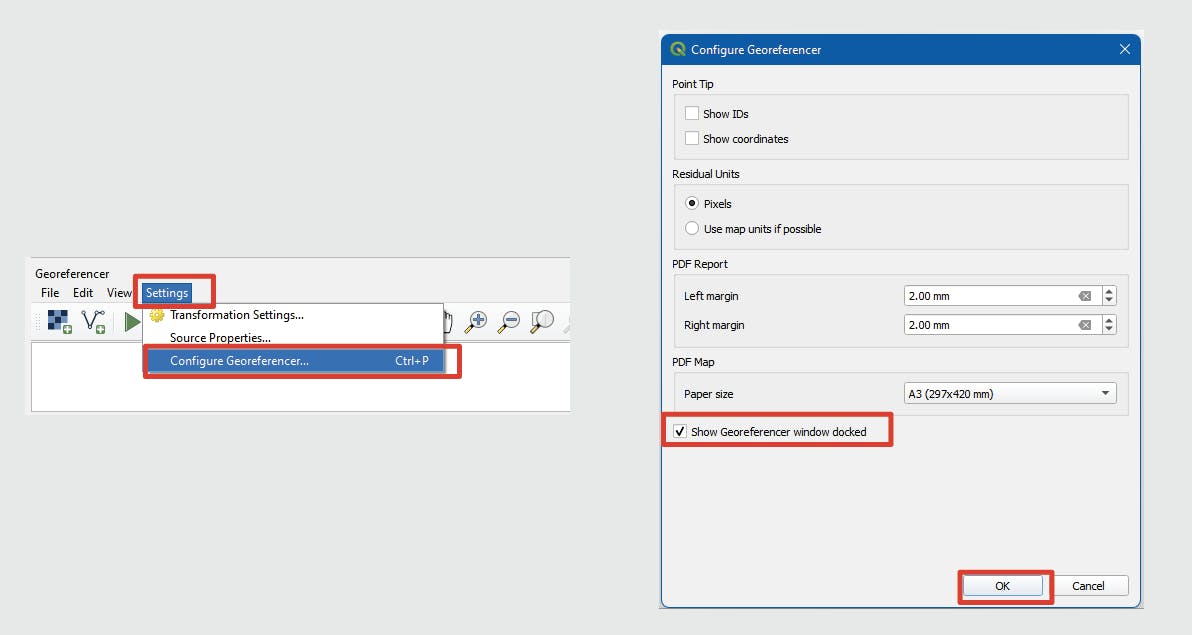
On the opened dialogue, adjust the settings to dock the Georeferencer tool on your map canvas.
Settings >> Configure Georeferencer > Show Georeferencer window docked > OK.
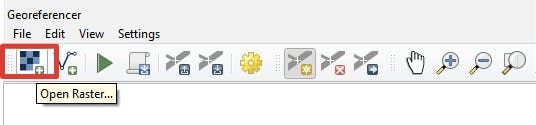
Add the raster image using the Open Raster button
Step 4: Setting Transformation Parameters
Before adding coordinates to the map, set up the transformation parameters from the transformation settings tab. Set Transformation type -> Polynomial 1 or 2. Check out the QGIS Documentation on the different transformation types required for the quality of the input data.
Set Resampling method -> Nearest neighbour. Set the Coordinate Reference System using the Target SRS field.
Browse the Target CRS in the image above >> search for the identified datum >> Find the most suitable from the listed Coordinate Reference Systems using the mini-map displayed below.
Set output raster name and directory. Set Compression -> LZW (this reduces the size of the output GeoTIFF file). Be sure to save the GCP points for future reference and load the data into QGIS when completed. >> OK.
Step 5: Add GCPs
This involves linking the coordinates of easily identifiable features on the OpenStreetMap with the features on the image. Use the zoom and pan tools to navigate both images. When selecting GCPs, intersections are a preferred option over rooftops.

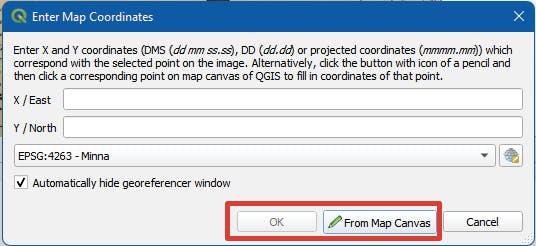
When in position, click the Add Point button and click any point on the image.
On the opened dialogue, use the ‘From Map Canvas’ option >> click on the specific point on the map and the corresponding point on OpenStreetMap >> OK.
Continue to add at least 6 Ground Control Points(for Polynomial 2) or 4 points for polynomial 1, as required by the polynomial 2 transformation type. The more fixed points entered, the better accuracy of your result. Watch out for high residuals (error values). GCPs can be unchecked to be excluded from the georeferencing process or removed by right-clicking on the point details.

Use the play button on the toolbar to ‘start georeferencing’
Step 6: Confirm Georeferencing
On the layers panel, click on the georeferenced image >> open layer styling >> Transparency > set Global Opacity to 30%
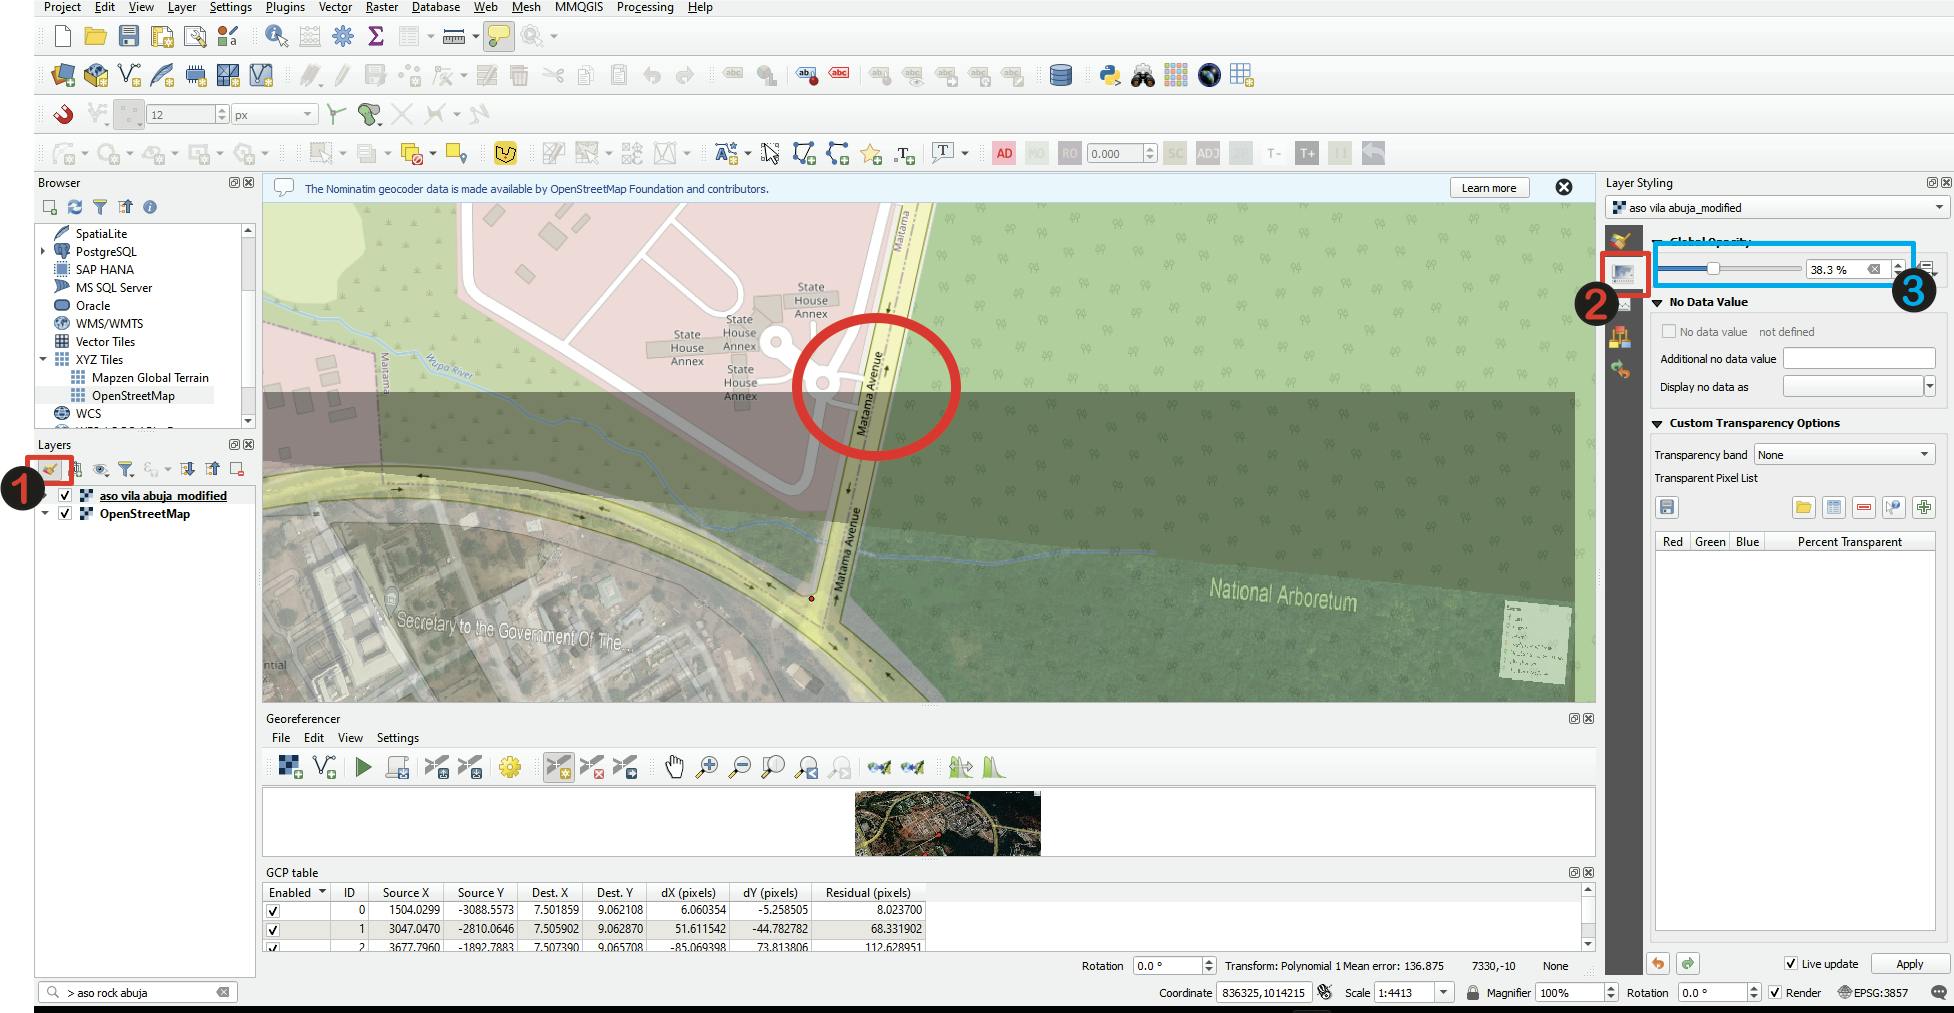
Your georeferenced image should fit perfectly with the OSM map.
Step 7: Access Saved GCPs
To access saved Ground coordinates, open the Georeferencing tool >> File >> Load GCP Points